A General Overview
The all-new Radarbox App brings flight tracking to the palm of your hand. With just a few taps on your smartphone, you can quickly track flights anywhere, anytime.
Whether you’re a pilot who’s checking to see how late your next flight is or you’re an aviation enthusiast who just loves plane watching, the Radarbox app is all you'll need!
The all new Radarbox App (iOS & Android)
The app is packed with most of the features that are available on our website and in the coming months, we plan on adding many more features to enhance your experience. Features like Augmented Reality, Alerts, and the My Station page are currently being developed and will be made available via an app update soon. We’ve also decided to keep the layout, buttons and color scheme just like the website, so that you get the same familiar look and feel when you use the app.
This beginner’s guide will help you get acquainted with the app and its features quickly and thoroughly.
Getting Started
Sign in / Sign up
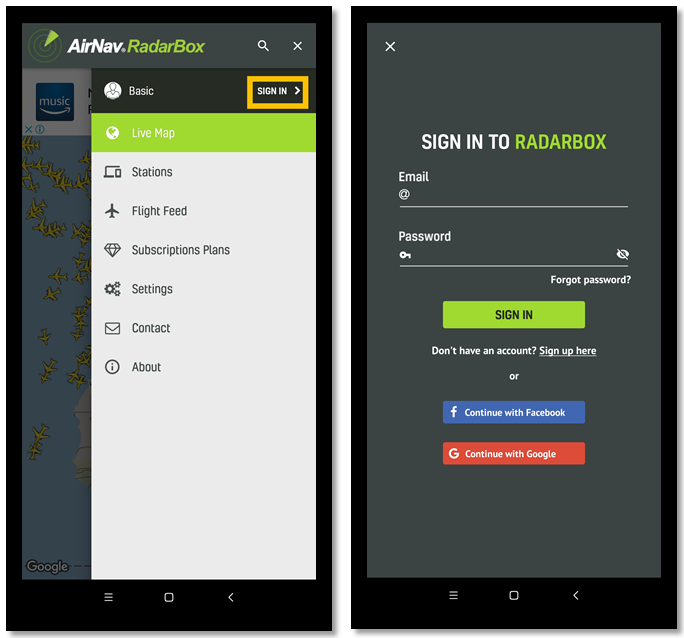
After downloading and installing the app the first thing you’ll see is the live map (with ads). If you already have a spotter, pilot or business account with Radarbox, you can sign in to your account by choosing the MENU option (3 vertical dots) on the top right side of your screen (next to the magnifying glass) and tap on SIGN IN. Next, enter the same email address that you used to sign up for a Radarbox account. Then enter the password and tap sign in.
If you have any issues while signing in or if you signed up for an account previously and don’t remember your sign in details, please send us an email ([email protected]) or choose the forgot password option if you’ve just forgotten your password.
The Sign In / Sign Up Process
If you don’t have a paid subscription account (spotter, pilot, business) with Radarbox, you can still use the app, but with limited features and ads. We recommend using the app with a subscription for the best user experience.
Our subscription plans start at $2.45 / month. You can view & buy subscription plans by tapping the MENU option (3 vertical dots) on the top right side of your screen (next to the magnifying glass) and then tapping on Subscription Plans.
Tracking A Flight
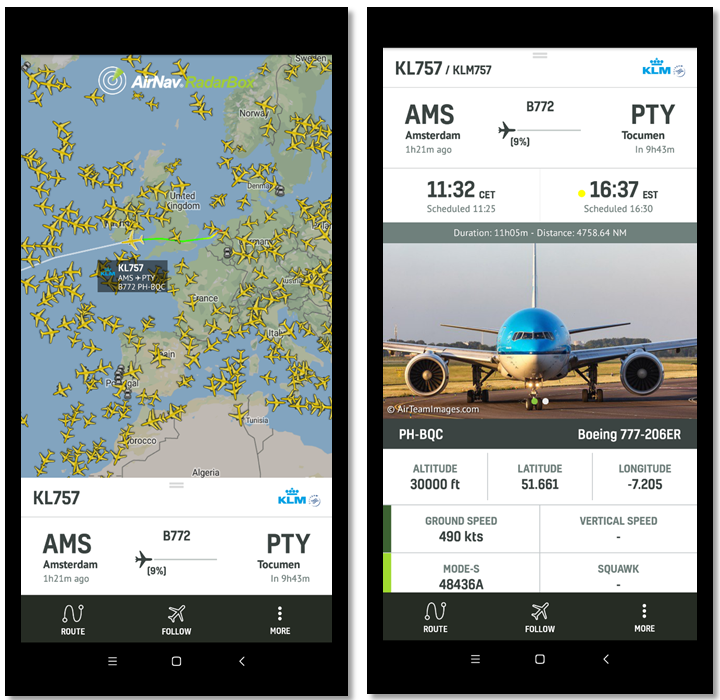
The Flight Card
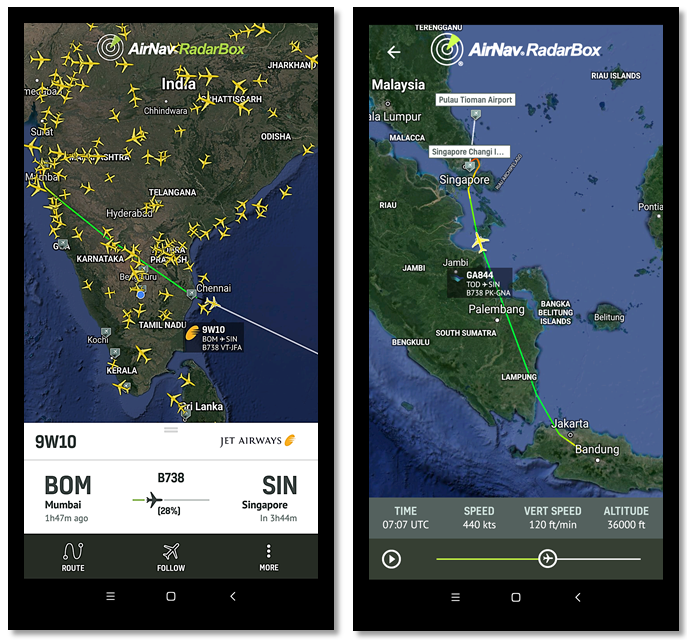
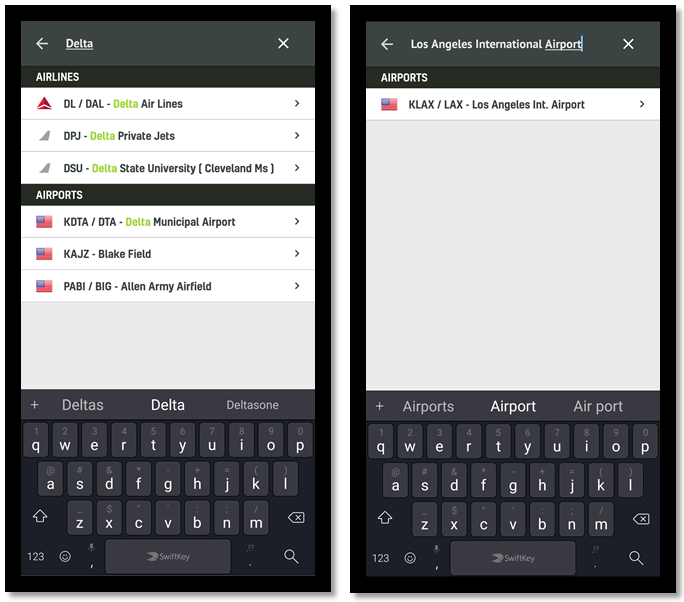
On the live map you can track aircraft by either tapping on the SEARCH button (magnifying glass) or by just tapping on the desired aircraft. The flight card, which shows real-time flight data as well as the route, will immediately show up.
Searching for Airlines / Airports using the search option.
The Flight Card displays the following Information.
- Flight Number, Aircraft Registration & Aircraft Type
- Origin & Destination Airports
- Departure & Arrival Time (Scheduled & Actual)
- Flight Duration, Distance and percentage of distance covered
- Altitude, Latitude, Longitude, Ground & Vertical Speed
- Mode-S & Squawk Codes
- Tracking Station & Data Source
The Flight Card
Other Features
- Route – The Route feature shows you the selected flight’s live route along with its origin and destination airport, while eliminating all other flights from the map, so that you get an uncluttered view of the flight you are tracking.
- Follow – The follow feature moves the map along with the aircraft, so that the aircraft doesn’t go off the screen. Again, it does this while hiding all other flights from the map.
- Flight Feed - This feature shows you a list of aircraft that are currently being displayed on your smartphone screen.
- More – The more section allows you to share flight information with friends, as well as look at historical flight data and origin / destination airport departures and arrivals.
Airports
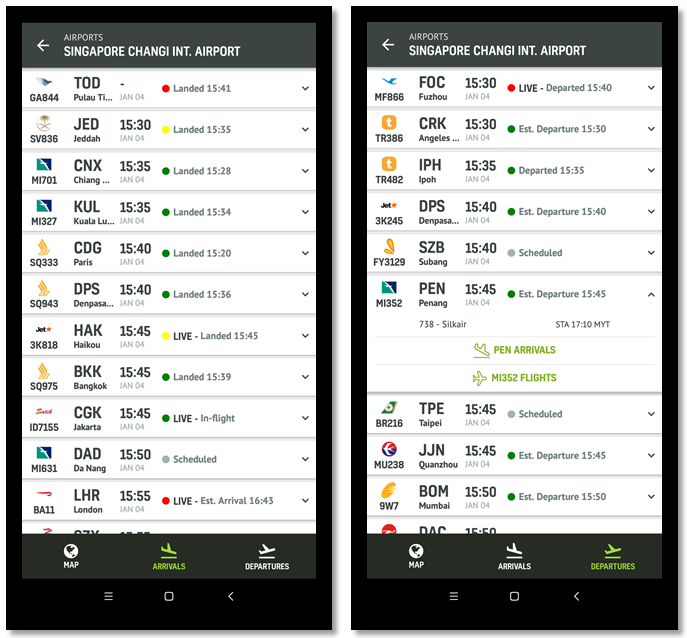
Arrivals & Departures List
To view the arrivals / departures card of an airport, you can either...
- Zoom in on the map and tap on the desired airport or,
- Search for the airport using the SEARCH option (magnifying glass) or,
- Just tap on a flight close to the airport of interest, and then tap on the airport from the flight card.
The Arrivals & Departures List
Once you’ve selected the airport you’ll see the ARRIVALS & DEPARTURES option.
Tap on either Arrivals or Departures to see the list of all Arrivals / Departures at the selected airport, with their estimated/actual arrival or departure time. Additionally, you’ll also be able to view the displayed flights in real-time (go to live map) and their historical data.
Airport Filter
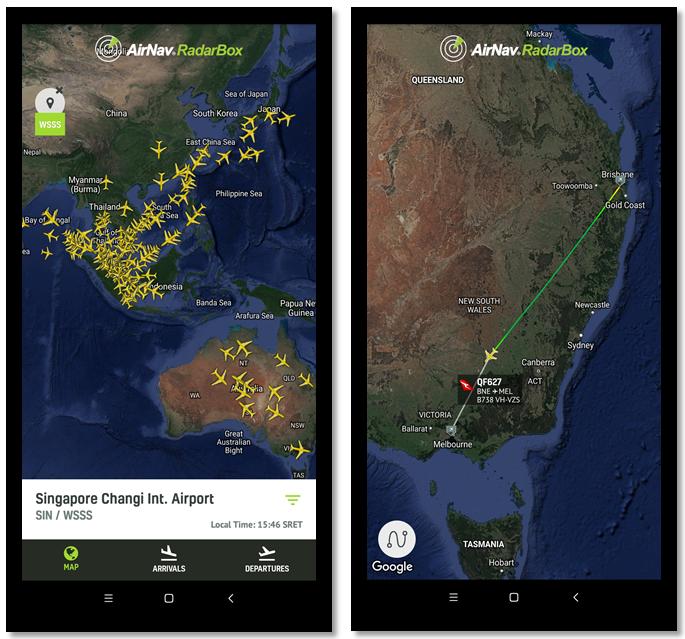
To view the inbound-outbound flights of an airport, first select an airport using one of the 3 methods above. Then tap on the FILTER option (3 horizontal bars, that look like a wifi icon) located on the lower right side of the screen. Instantly, all the inbound-outbound flights of the particular airport will be displayed and all other flights will disappear from the screen.
The Airport Filter (left) and Route Filter (right)
To remove/delete the filter, simply tap on the circular icon displaying the Airport name at the top left of the screen.
Stations
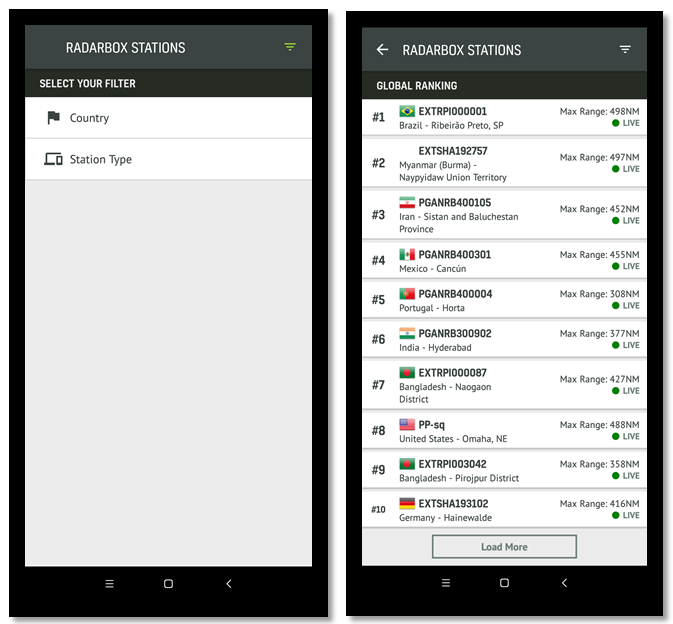
Another great feature we’ve added to the app is the Radarbox Stations Ranking page, where users can see their receiver’s ranking based on station type or country.
My Station Ranking Page (Country / Station Type)
To view this feature, choose the MENU option (3 vertical dots) on the top right side of your screen (next to the magnifying glass) and tap on STATIONS. Then select your country or your station type and you’ll be shown the top data feeding station rankings based on country / station type.
Settings, Filters & Layers
Settings
To access the settings page, choose the MENU option (3 vertical dots) on the top right side of your screen (next to the magnifying glass) and tap on SETTINGS.
On the settings page you can change / update measurement units such as
- Altitude – Feet / Meters
- Distance – Nautical Miles / Kilometers
- Speed – Knots / Kilometers per hour
- Lat/Long – Decimals / Degrees
- Designator – IATA / ICAO
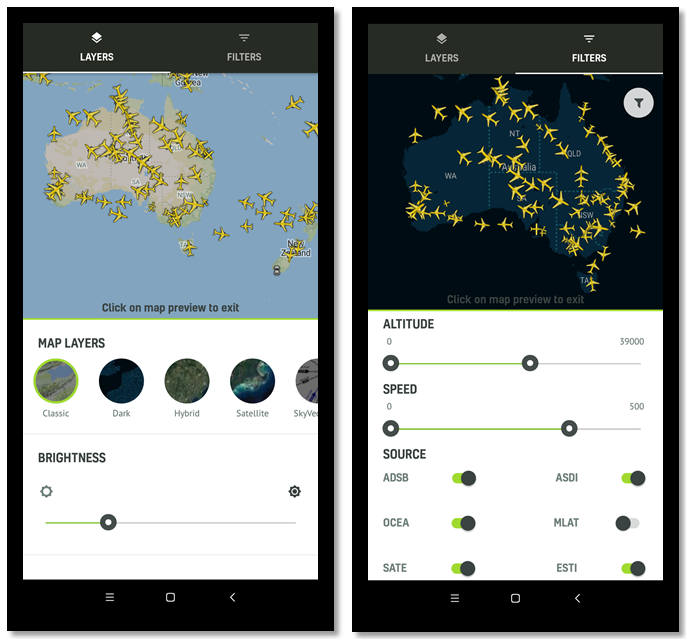
The Layers and Filters Page
Layers & Filters
To access the Layers page, tap on the Layer’s option on the bottom right side of your screen. In the layers page, you’ll be able to choose up to 7 different map layers, ranging from satellite view, to vector views. You’ll also be able to adjust brightness and add the weather layer and labels.
The filters page can be accessed by tapping the FILTER icon on the top right side of the screen.
The filters page lets you customize and filter out the fights you don’t want to see or want to see. Filter options include a sliding Altitude & speed filter & data source filter that let you toggle various sources that Radarbox receives data from.


