Setting Up Your New Receiver
HOW TO SETUP A RADARBOX24 RECEIVER
Setting up a new receiver is an extremely easy process. And in this short tutorial we’re going to talk about how to quickly and correctly set it up.
Contents
Once you open up the package, make sure you have the following contents (Fig.1.a).
- RadarBox Receiver
- External Antenna with attached Co-axial Cable
- Power Supply
- Ethernet Cable
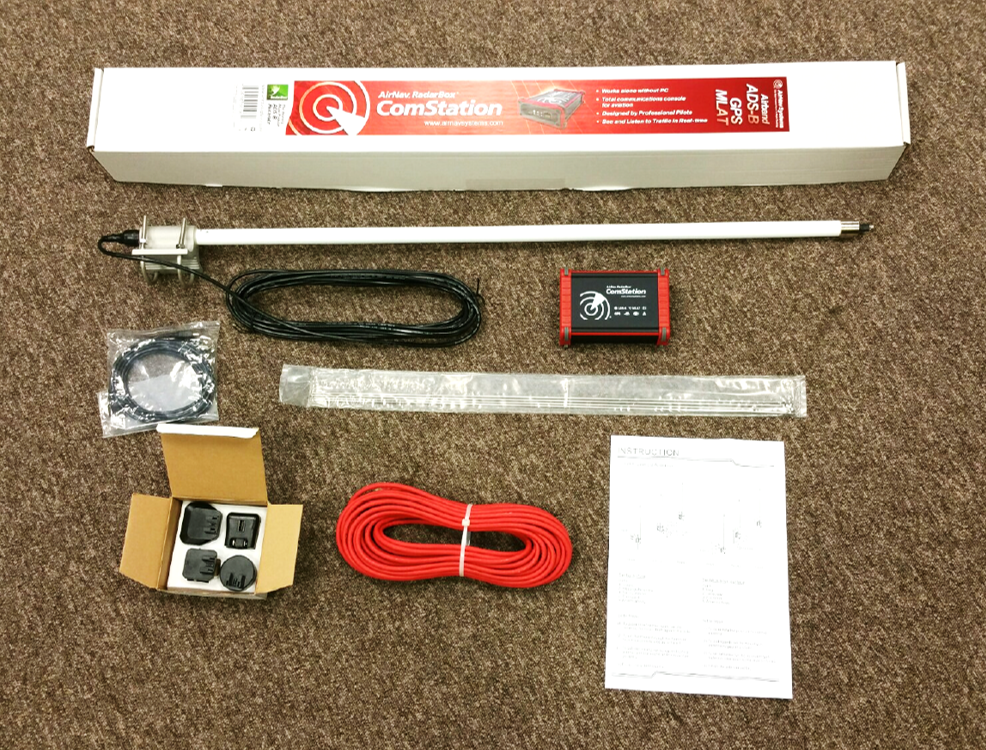
Fig. 1.a
Mounting The Antenna
Mounting your antenna is probably the most important step in this entire process, as the position and placement of the antenna will determine its range. An antenna that is placed with a clear 360 degree view of the sky and is clear of obstacles like trees and buildings, will have better range than an antenna that has obstacles blocking it. Keep in mind that ADS-B is based on the line of sight principle.
Before mounting your antenna, choose a suitable location on the roof of your house. Make sure the location that you choose is as high as possible with minimal obstruction. Also take into consideration the length of your co-axial cable, which is generally either 7.5 meters or 12 meters.
Fix your antenna onto a pole on the roof of your house or if required, drill 4 small holes to fix the screws to hold the antenna in place.
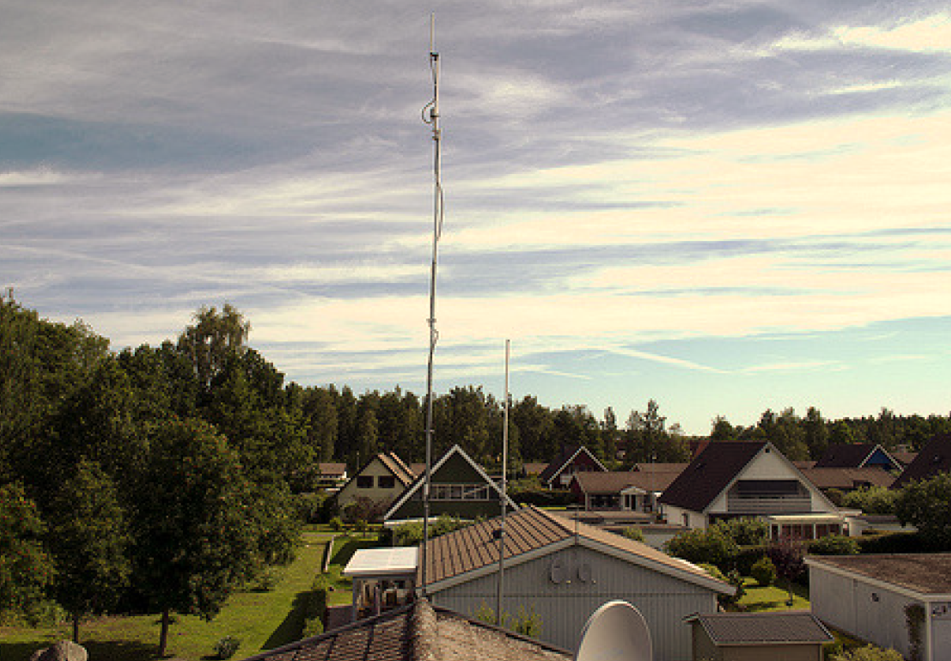
Fig. 1.b
Placing Your Receiver
Once the antenna has been setup, find a cool dry area to place your receiver. Keeping your receiver near a window is never a good idea as rain water and snow may damage the receiver by causing short circuits. Enclosing or further encasing your receiver is not recommended either as it may not allow the heat that is generated by the receiver to be dissipated properly.
Connecting Everything Else
Connecting the wires is the easy part. Follow the steps given below.
- Connect the co-axial antenna cable to the Radarbox24 receiver.
- Take one end of the Ethernet cable and connect it to the Radarbox24 receiver, then take the other end of Ethernet cable and connect it to your Internet modem or router.
- Connect the power supply cable to the Radarbox24 receiver and then plug it into the power socket in the wall.
- The receiver will then automatically turn on. After about a minute the unit will automatically connect to the internet and start feeding to our servers.
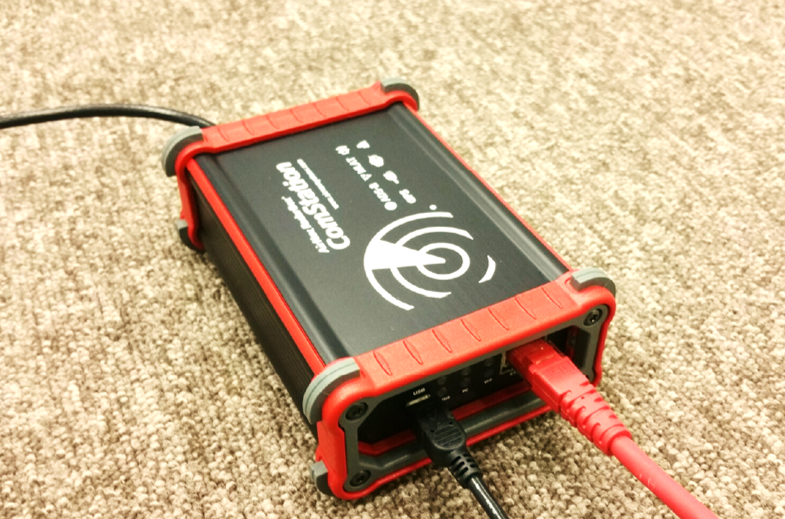
Fig. 1.c
LED Lights
If your receiver is connected correctly and is decoding and feeding to our servers, the following LED lights will appear.
- MODE S – Blue Color (Flicker – 1.d)
- STATUS – Green Color (Constant - 1.d)
- GPS – Orange Color (Periodic 3 seconds - 1.e)
- PC – Dim Orange Color (1.e)
- ERROR & VHF – No LED lights
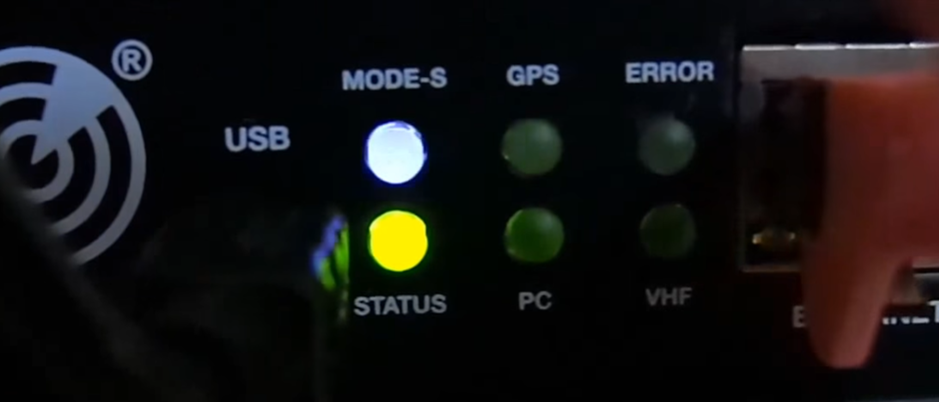
Fig. 1.d
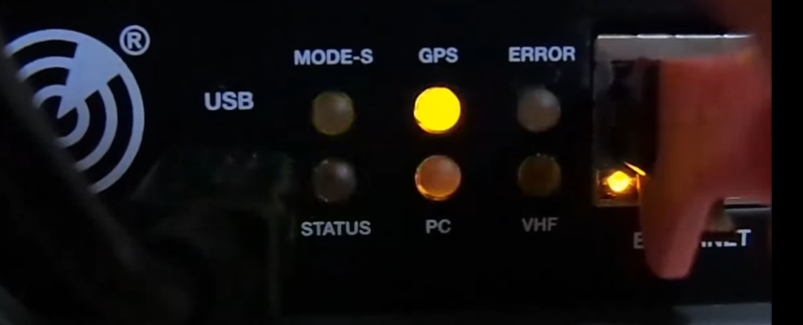
Fig. 1.e
If any of these LED’s do not light up or show a different color it might indicate an error and you must either contact us or check the manual for troubleshooting to pin point the problem.
Need Help Setting Up?
During the setup process if you encounter a problem, please feel free to contact us by email at [email protected] so that one of our engineers can help resolve your issue. We try our best to resolve issues within 48 hours.