On-Demand API version 2.0 released + hands-on user's guide
What's new?
The newly relased v2.0 brings in many changes and features our customers have been asking for:
| OpenAPI 3.0 | Isn't it great when different systems can speak the same language? We have documented our web services with OpenAPI 3.0 making life easier for anyone implementing their own custom clients. Generating client SDK's is a breeze and you get started without writing more than two lines of code. Check out the API spec |
| Seamless flights search |
We have merged all our endpoints for searching flights into one. It doesn't matter if a flight has already happened, is mid-air or still on the ground - just set your criteria and you'll get all the information on matching flights. |
| Region-based search |
Ever wondered what kind of air traffic flies over your roof? You just need to provide a geographical region and a time frame and we will show you which flights have been tracked by us. |
Getting your free token
You get a free token with your business account which will give you enough credit to play. You can find yours by navigating to your API Dashboard.
Once you have it, open up the API documentation in a new tab so you can keep reading the how-to guide here
Step-by-step guide
The steps below will show how easy it is to interact with the API.
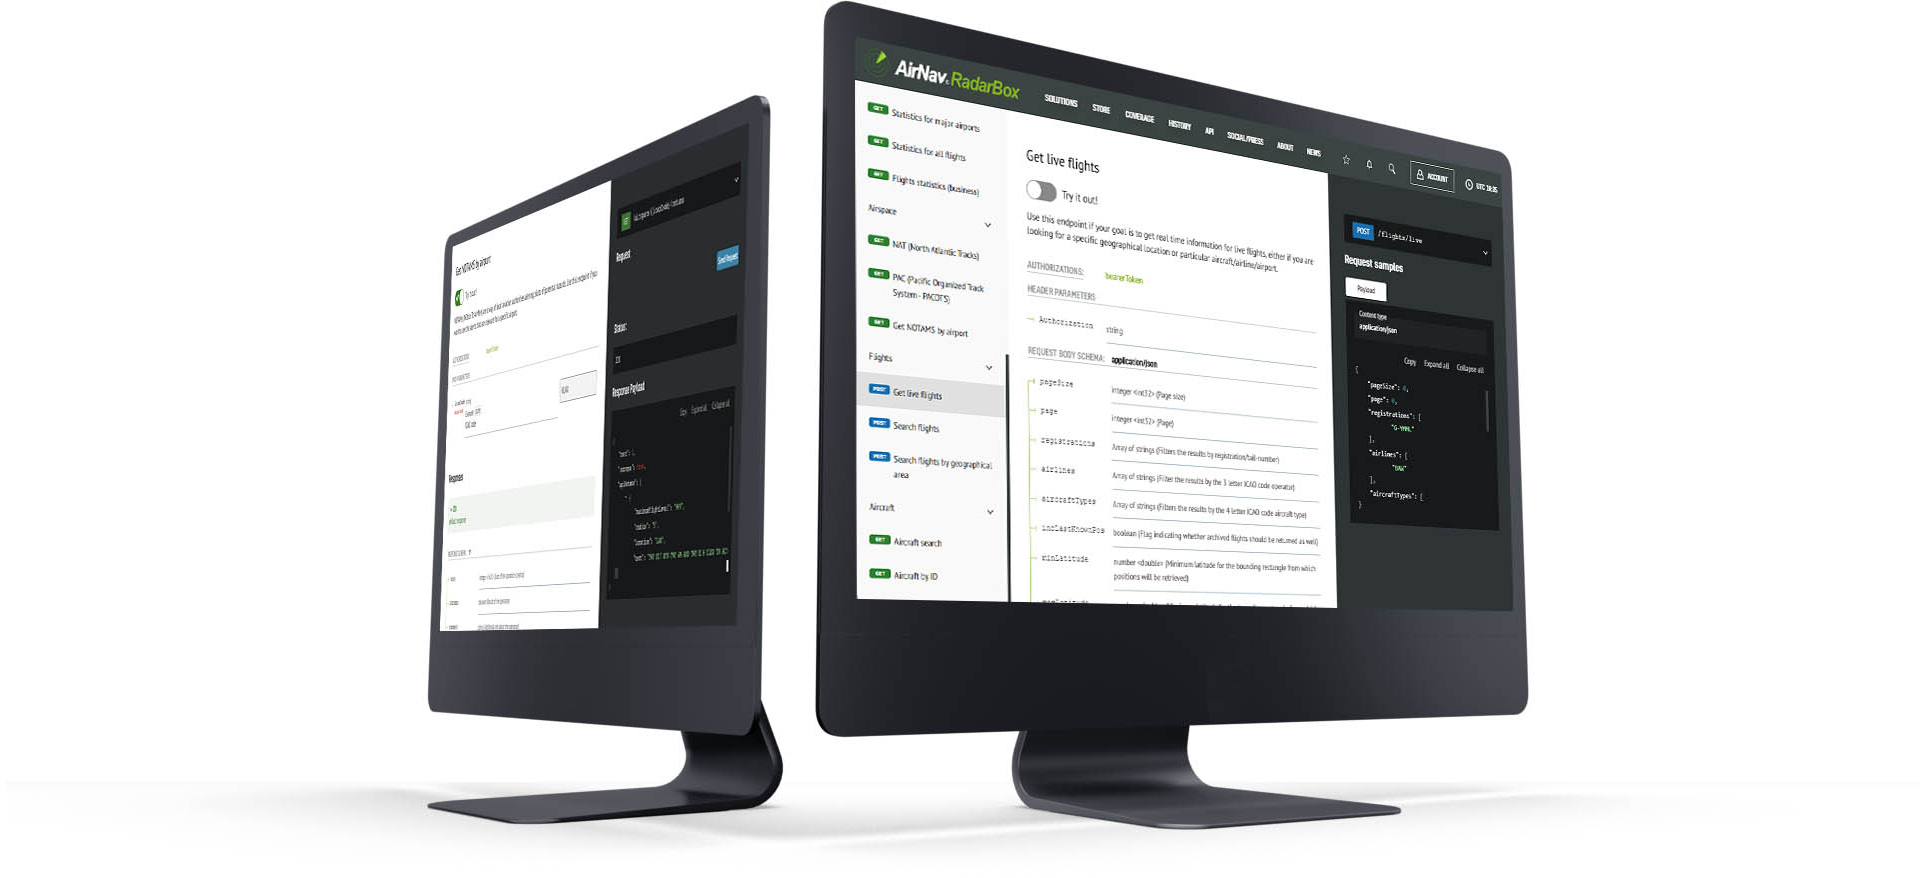
In the documentation page you'll be able to scroll through the specs
1. Authenticate
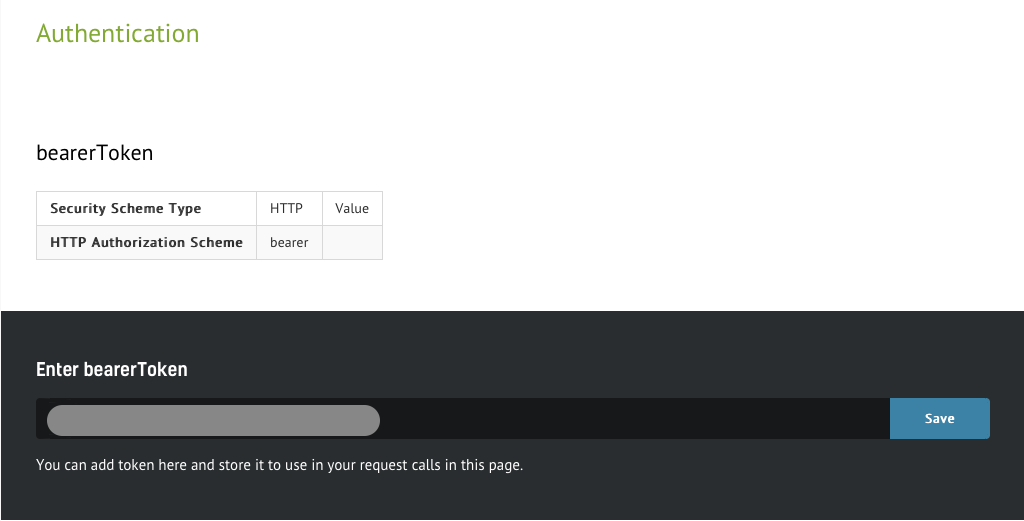
Every call needs to be authenticated so you need to put the token you wish to use in context. Simply insert the token in the designated form and hit "Save" button. From here on, all service calls will be associated to your account.
2. View all available services
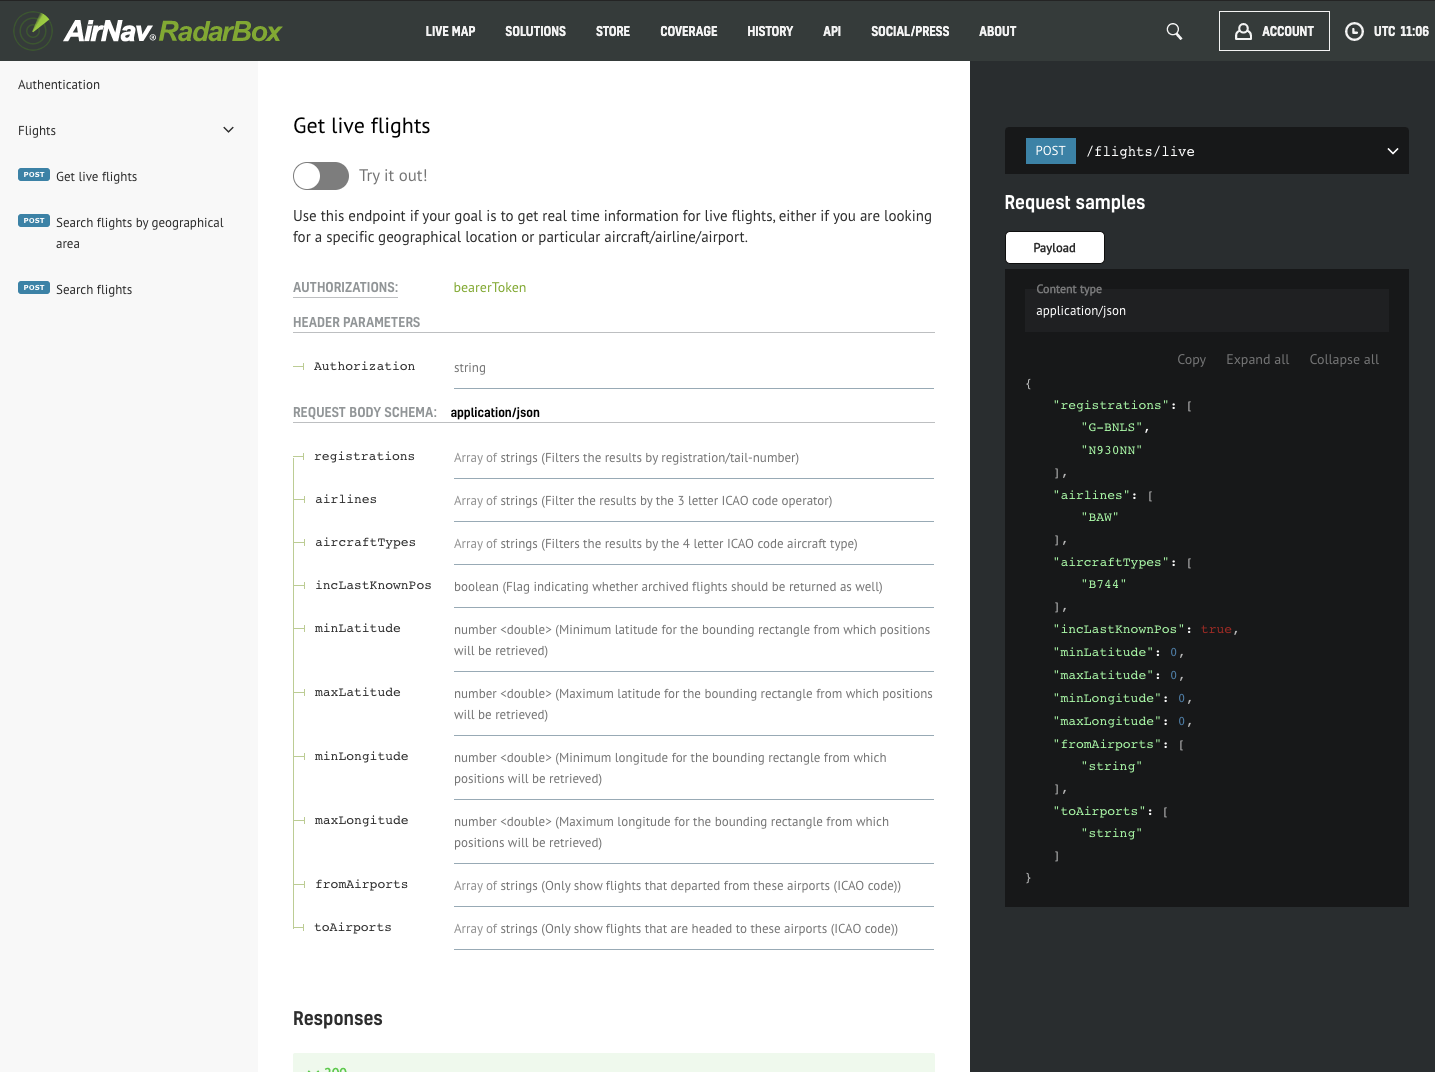
In the left menu you can find a list of the available services. Clicking on each one will take you to the endpoint details where you can find information such as required parameters and detailed format of the response.
3. Enter testing mode
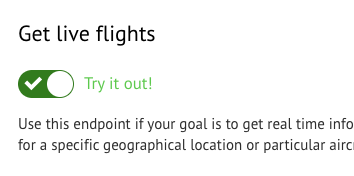
Click the “Try out” button which will activate the test mode and you will be able to submit live requests.
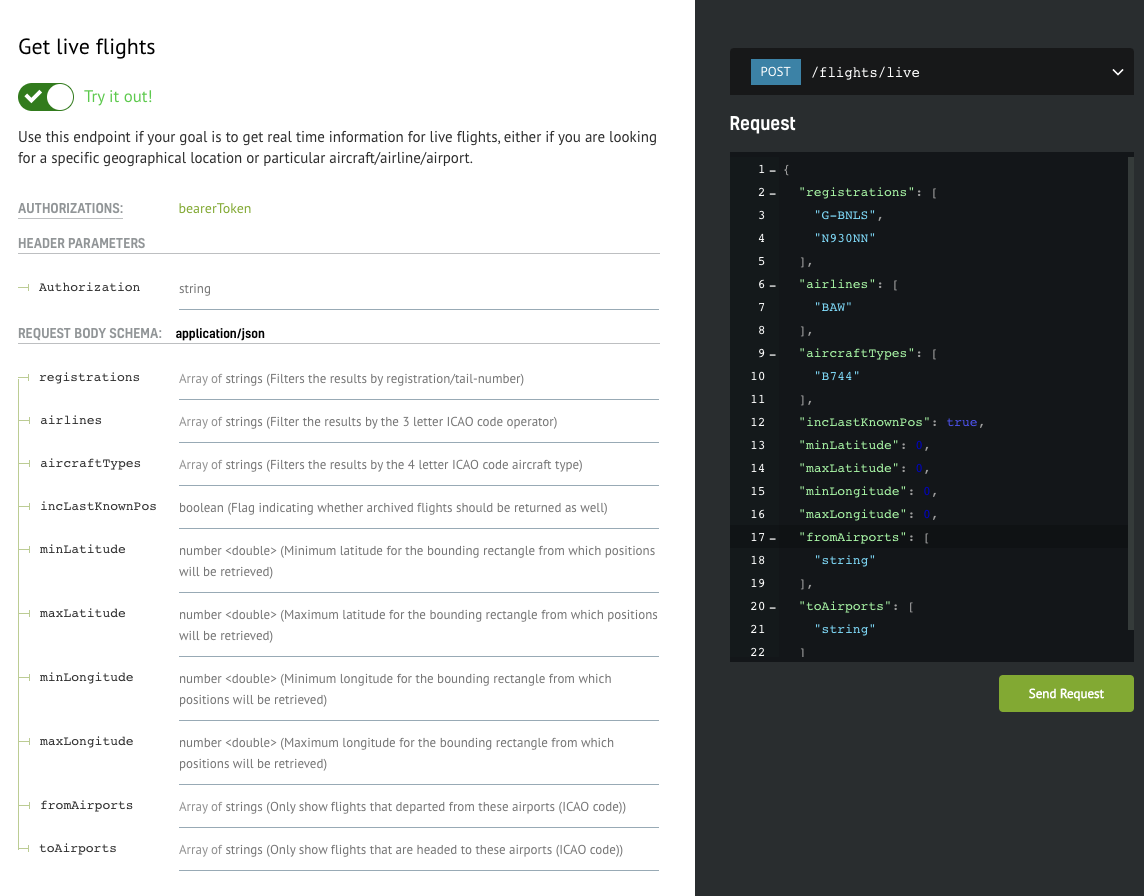
One you’re in test mode, you will have the request spec on the center column and a text box with the payload of your re quest on the right. It will be pre-filled with test values which you will need to customize.
4. Sample test case
One of the simplest scenarios is trying to find out what the current position of a specific aircraft is.
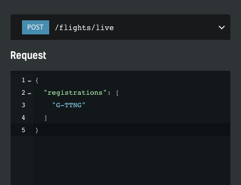
We have edited the sample payload stripping everything except our criteria: get the current position for the aircraft with tail number G-TTNG. After hitting the “Send Request” button we should get a response within seconds. If all goes smoothly we should see the status code of the request and the response payload popping up below the initial request
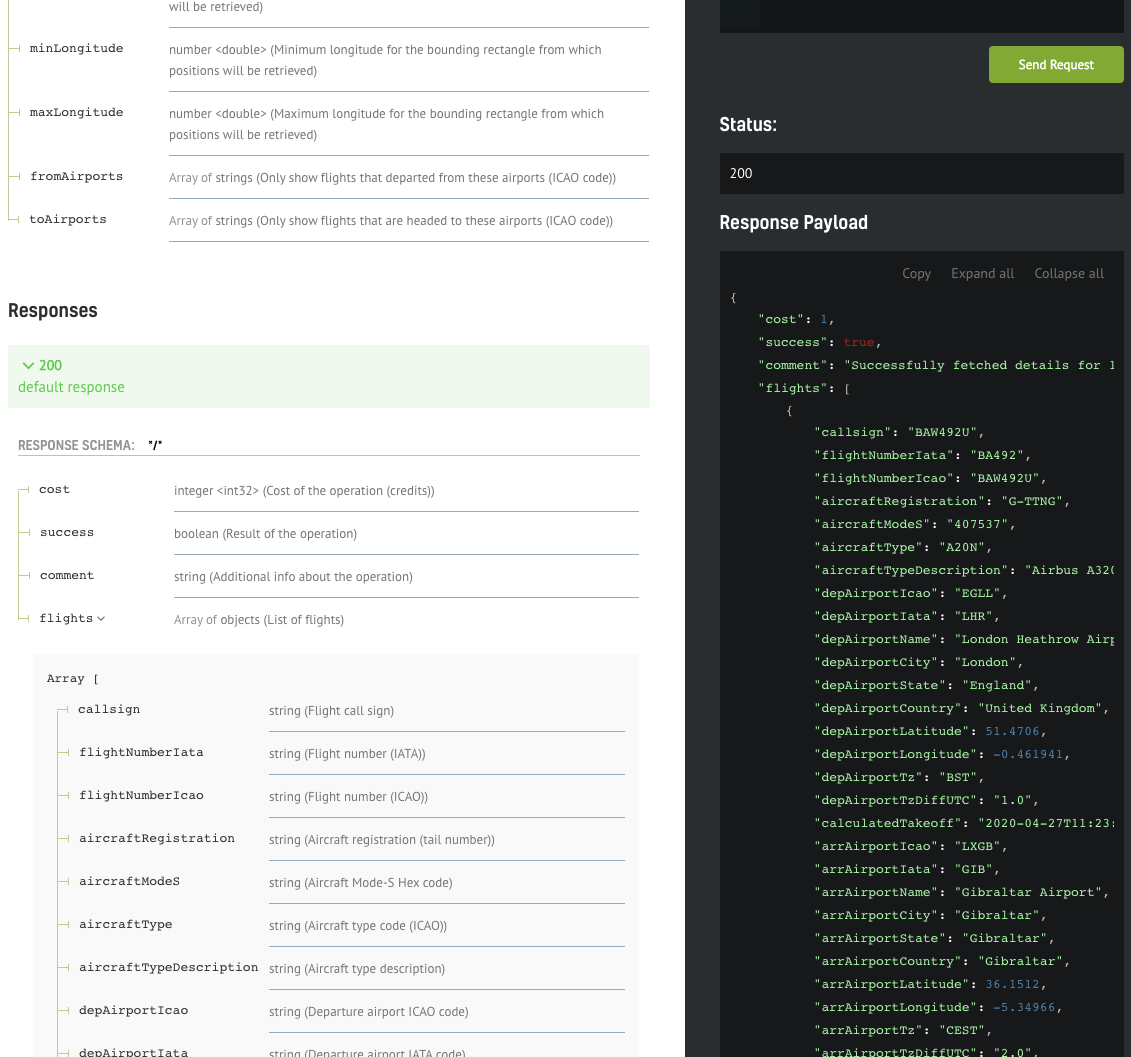
The documentation of the response fields should be visible on the left of the response payload, making it easy to interpret the data.
Implementing your own client
The interface shown above is great for prototyping your calls, but of course you still need to implement your own API client. We will show how easy it is to have a full Python API SDK working with only a few lines of code.
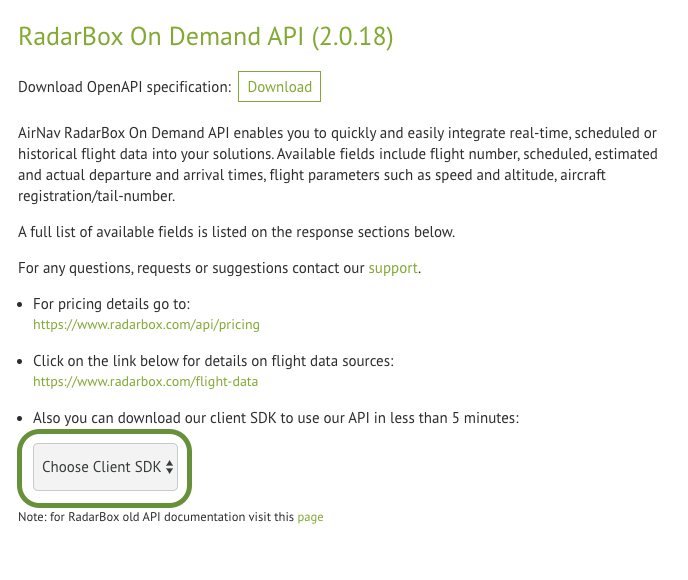
You can download the web service client in your favourite language/framework - we currently support most popular ones such as C#, Java, PHP, Python, Scala, Swift and Javascript.
Simply select your option from one of the items in the dropdown menu and the download will start automatically. Once complete you need to extract the archive and open the contents in your favourite IDE.
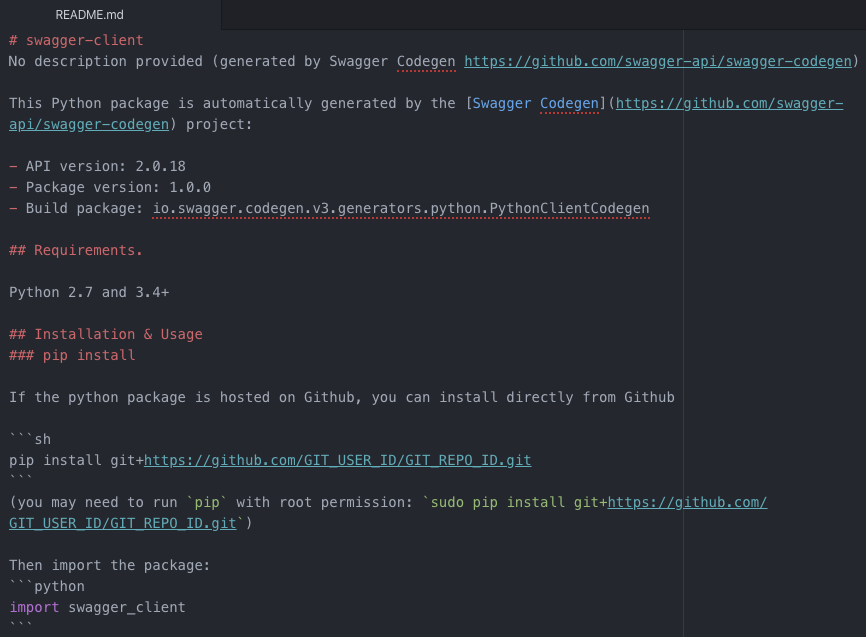
The README.md file contains valuable information and is tailored to the framework we're interested in. In this case, there are instructions on how to setup up your Python environment in order to be able to run the API client smoothly. There are also code snippets that you can copy/paste directly to your code.
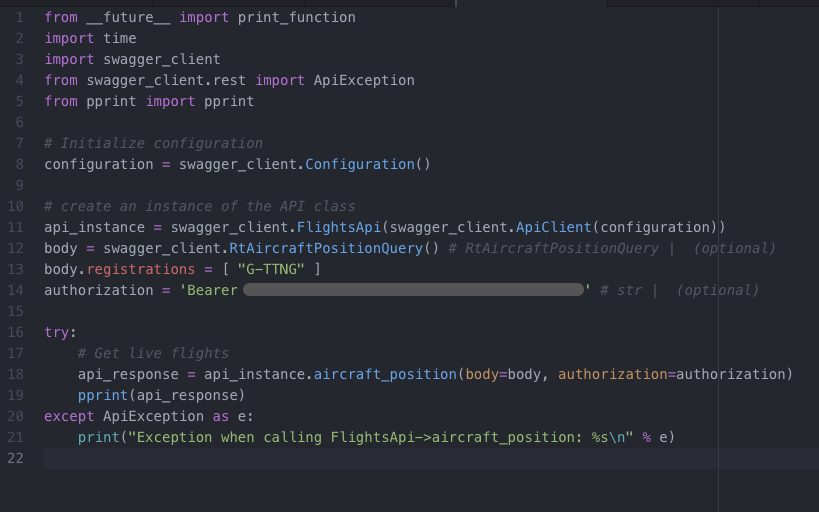
We have copied the snippets from the README file into our own file "liveflights-client.py" and we only needed to add two things: the authentication string (bearer token) and the search parameter (registration "G-TTNG"), same as the call we have previously created in the testing interface.
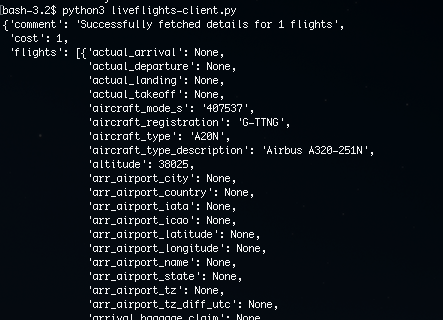
After saving the file we can open up a terminal and use Python to run the client we have just implemented.
We hope this quick-start guide was useful.
Please also check our compilation of practical examples and common use cases by visiting https://www.radarbox.com/blog/on-demand-api-v2-examples
READ NEXT...
- 5613
On-Demand API version 2.0 use cases
 4305
4305AirNav RadarBox On-Demand API Series: Airspace Data
This week's AirNav RadarBox API focus is on airspace data such as NOTAMs (Notice To Airmen), NAT (North Atlantic Tracks), and PAC (Pacific Organized Track System - PACOTS). Read our to find out more!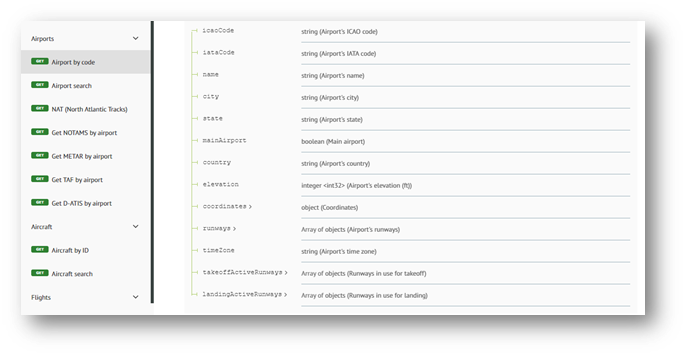 3328
3328RadarBox On-Demand API
The AirNav RadarBox On-Demand API enables seamless integration of flight data into client applications.