Introduction
Developed in 2017 by AirNav Systems, the XRange is RadarBox’s flagship standalone ADS-B receiver. It is the result of years of experience in the development and testing of flight tracking sensors in some of the world’s most challenging conditions.
XRange ships with all of the required components, making the setup process quick and uncomplicated. Major improvements to the hardware such as inbuilt filters for efficient band filtering, a preamplifier for a boost in range and the latest stock firmware, make the XRange the top-rated choice of enthusiasts and professionals to track flights.
Package Contents
Once you open the package, you’ll typically find the following contents:
- RadarBox XRange Receiver
- External 1090MHz Antenna
- Power Supply
- Ethernet Cable
- Wall Socket Converters

Technical Specifications
|
Voltage rating |
5V DC (Mini-USB connector) |
|
Current rating (max) |
2A |
|
Ethernet |
100Mbps (RJ45 connector) |
|
ADS-B receiver |
SMA female connector on the receiver; omnidirectional antenna optimized for 1090MHz, with SMA male connector |
|
Operating temperature |
-10ºC – 45ºC (14ºF to 113ºF) |
|
Power supply |
100-240V AC 50-60Hz input rate, 5V DC 2.1A output rate |
Antenna Setup
Mounting your antenna is probably the most important step in this entire process, as the placement of the antenna will determine its range. An antenna that is placed with a clear 360-degree view of the sky and is clear of obstacles like trees and buildings will have better range than an antenna that has obstacles blocking it. Keep in mind that ADS-B is based on the line of sight principle.
Before mounting your antenna, choose a suitable location on the roof of your house. Make sure that the location that you choose is as high as possible with minimal obstruction, then follow the instructions below to mount the antenna.
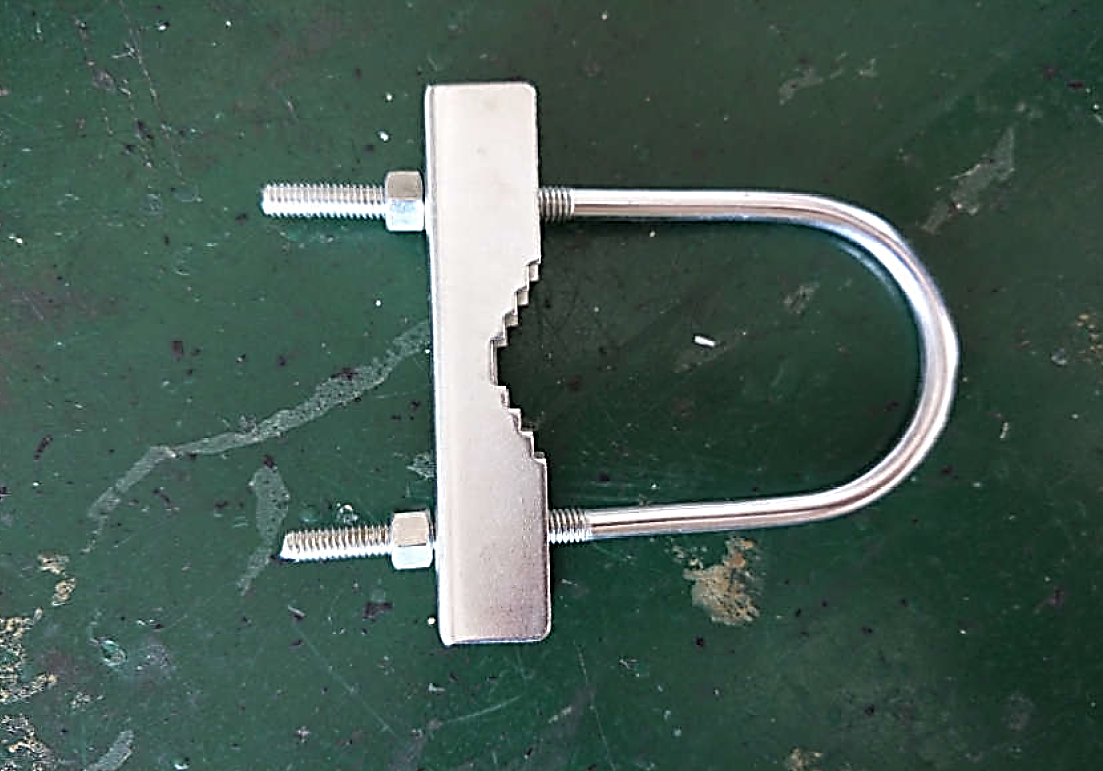
Step 1
Screw the metal loop holder into the mounting bracket with the screws provided.
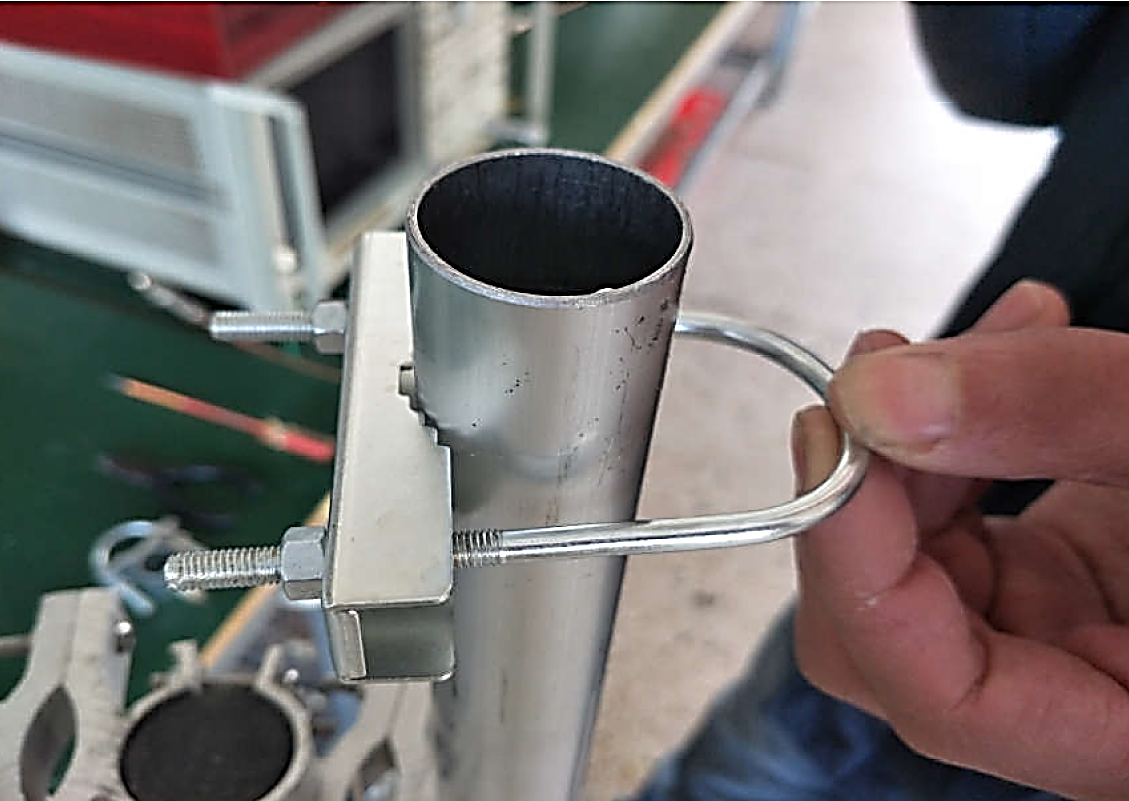
Step 2
Fix the mounting bracket onto a pole.
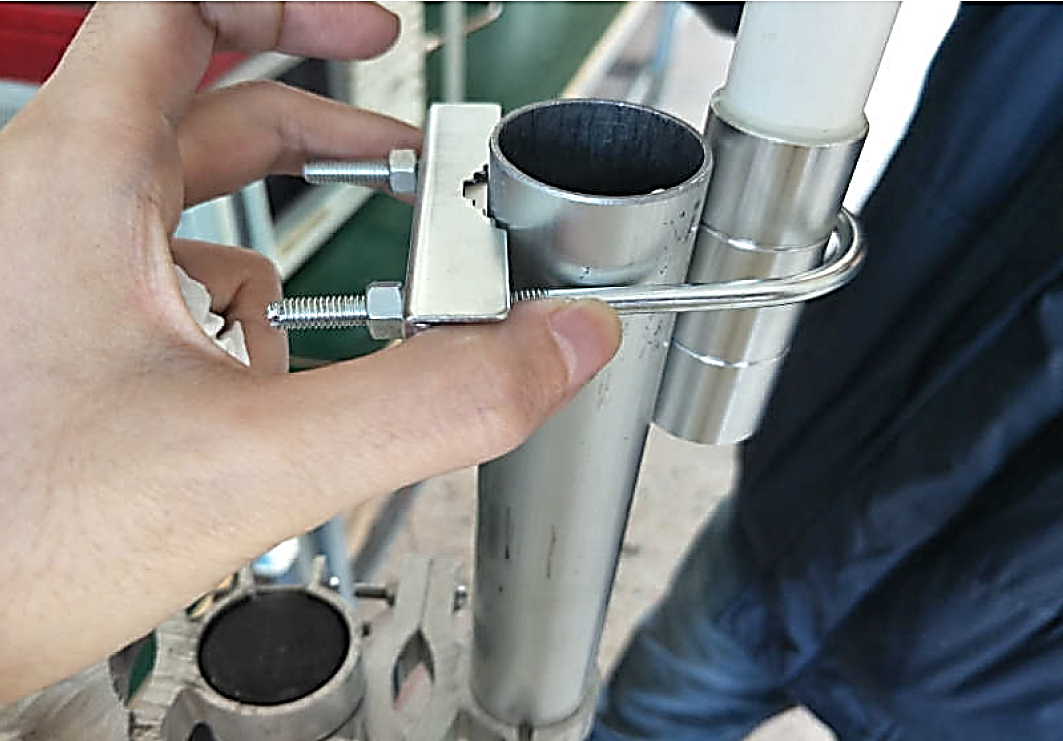
Step 3
Place the antenna in between the pole and the holder.
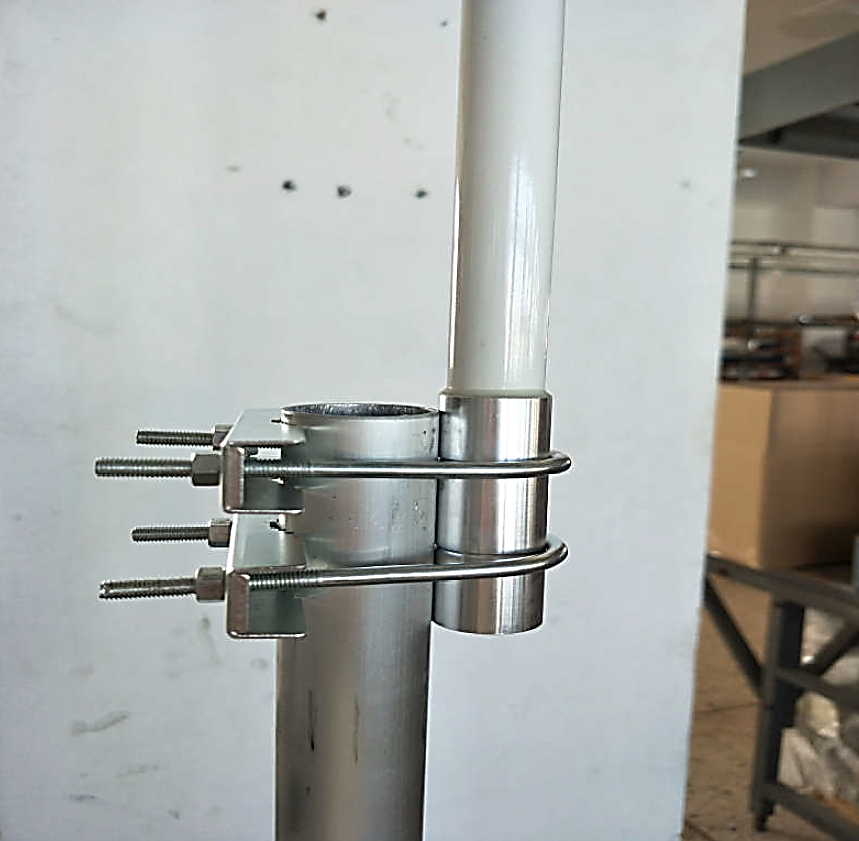
Step 4
Tighten the screws and make sure that the antenna is secured firmly to the pole.
Receiver Setup
Once the is antenna set up, the next step is to connect the power and ethernet cables. Follow the instructions below.
- Connect the ADS-B antenna to the antenna plug on the receiver.
- Connect the Ethernet cable to the Ethernet socket on the receiver and to your Internet router / modem.
- Connect the power supply to the Mini-USB socket.
- The receiver will then automatically turn on. After about a minute, the unit will automatically connect to the Internet and start feeding data to our servers.
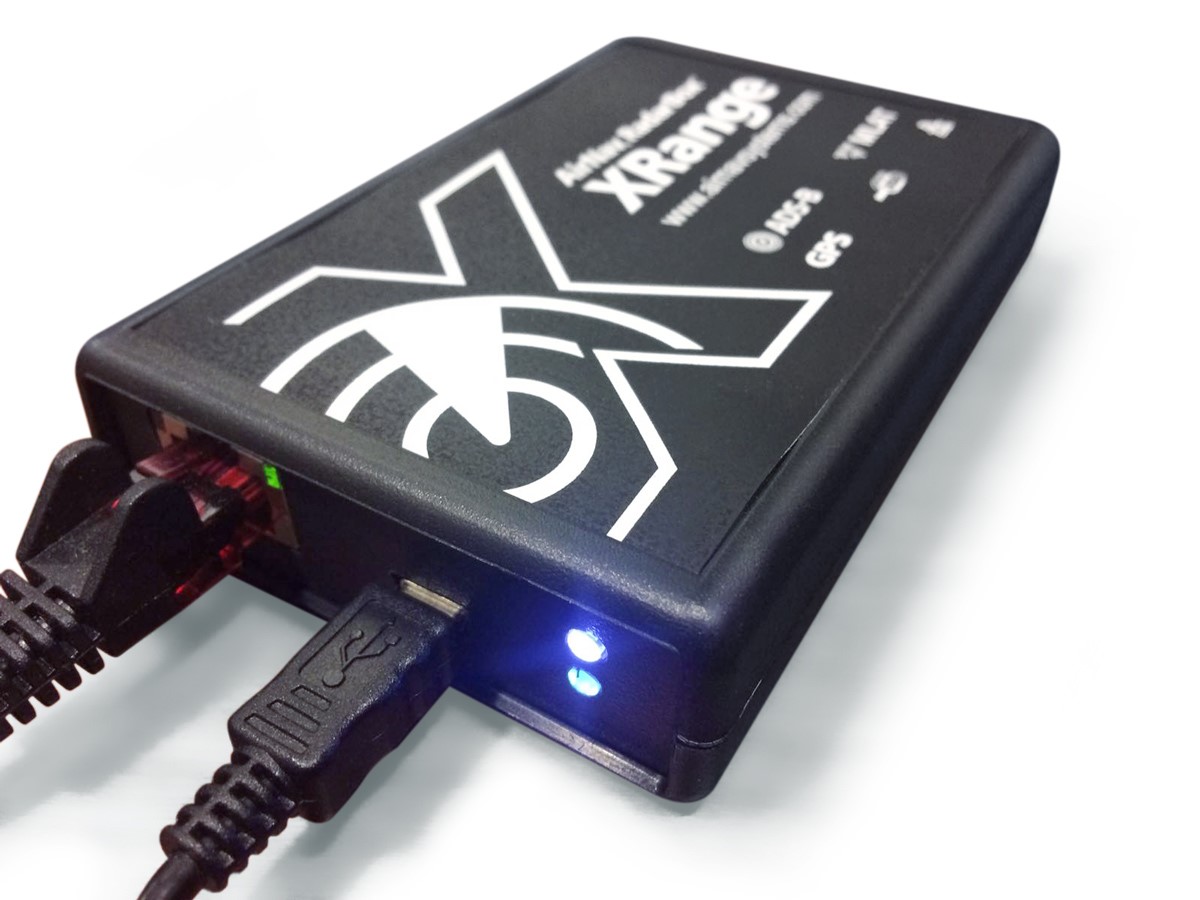
LED LIGHT INDICATORS
|
Green LED |
|
|
On |
Unit is powered on and booted completely. |
|
Off |
Unit is powered off or boot is not complete. |
|
White LED |
|
|
Off |
Unit is not capturing any ADS-B data. This can mean that there is no aircraft nearby, or the antenna is disconnected. |
|
On – flashing |
Unit is successfully capturing ADS-B data. |
|
On – static |
ADS-B decoder software is initializing. |
|
Ethernet LEDs |
|
|
Amber LED – on (flashing) |
Network activity present. |
|
Amber LED – off |
No network activity. |
|
Green LED – on (static) |
Cable connected. |
|
Green LED – off |
Cable disconnected. |
|
Internal LEDs |
|
|
Green LED – on |
Unit is powered on. |
|
Green LED – off |
Unit is powered off. |
|
Red LED – on |
Internet connection problem / other error. |
|
Red LED – off |
No errors. |
*If any of these LEDs do not light up or show a different color, it might indicate an error and you must either contact us or check the manual for troubleshooting to pin point the problem.
Viewing Air Traffic
All XRange receivers share real-time air traffic data with the AirNav Systems servers. To view live air traffic in any part of the world, just visit the RadarBox.com website on your desktop or use the RadarBox App for iOS (iPad, iPhone) or the RadarBox App for Android.
MyStation Page
In addition, RadarBox has a special page for feeders to monitor the flights that their XRange receiver is tracking. This page is called the “MyStation” page and is automatically generated the first time your receiver sends data to the RadarBox servers.
The “MyStation” page can be accessed at:
https://www.radarbox.com/stations/PGANRBXXXXXX
(replace the XXXXXX with your unit’s serial number found on the sticker at the bottom of the unit).
On the MyStation page, you will be able to monitor the following:
- Flights currently tracked by your receiver
- Average & maximum range of your receiver
- Uptime stats, country ranking and much more
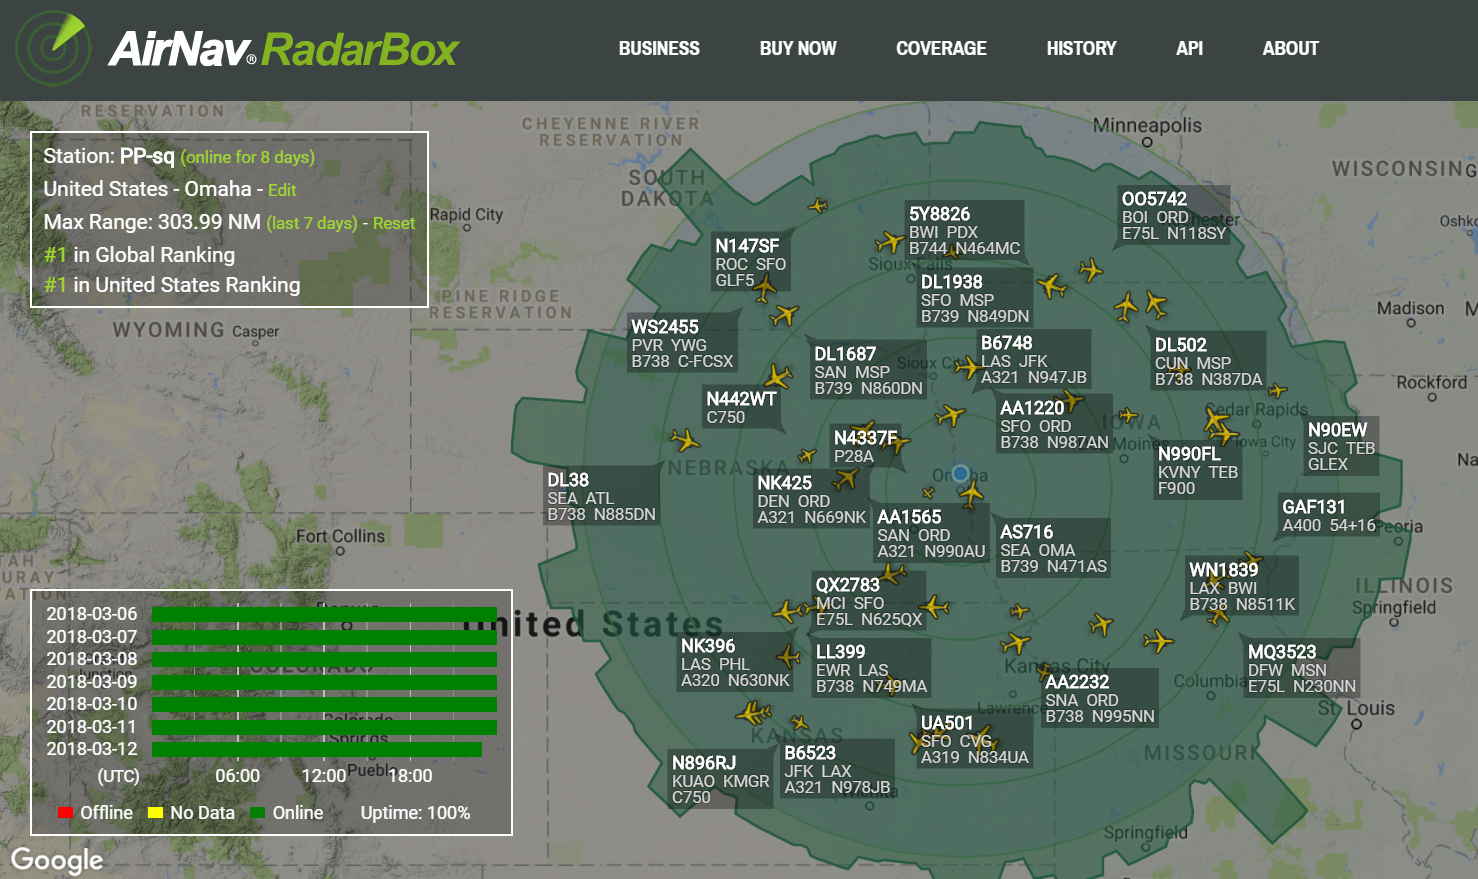
Example of a MyStation page on RadarBox.com
Legacy Usage (Windows)
To use of your XRange receiver with the AirNav RadarBox Windows application, make sure that you have the latest version installed. Download the latest version of the application from this web page: www.airnavsystems.com/software/radarbox (check under “Software and Drivers”).
Instructions
Before configuring the software, make sure that X-Range receiver is connected to the same network as your computer. Next, follow the instructions to configure the application:
- Start up the application;
- Go to "File" then click "Preferences";
- Next click on the "RadarBox" tab;
- In the "RadarBox New Firmware" section, please enter the local IP address of the unit;
- Make sure that the "Port" is set to 32088;
- Click “OK”;
- The application should be able to detect the XRange receiver automatically. If not, please restart the application.
Please note that no drivers are required in order to use the XRange receiver.
Real-time Raw Data Formats
You can obtain real-time flight data from your XRange unit in several widely used formats:
- Mode-S Beast binary format
- Mode-S Beast AVR format
- MSG format
- BaseStation Raw Data Socket format
Additional formats can be made available upon request.
The raw data function is disabled by default. Please contact us if you wish to enable it. Our support team will also send you all the necessary details on how to access the data.
Status Page
Your XRange’s status page displays additional receiver information that is helpful during troubleshooting. The status page can be accessed locally within the same private network by entering the local IP address of the receiver into a web browser, or by entering the following URL: http://anrbXXXXXX/
(where XXXXXX is the unit’s serial number found on the sticker at the bottom of the unit).
Still have questions? Contact us!